Configure User Filter Manual Mode
Let’s consider the Hotel Revenue Management Dashboard sample here. In this dashboard, we will configure the user filter so that the staff and managers can view the data specific to the continent.
To start, open the User Filter Dialog by following the steps mentioned here
In the manual mode UI, we will first select the column to be used as the filter. In this case, we will choose the Region column. A name can also be set for the filter for better user understanding when multiple filters are created for the same dashboard.

Once the column is selected, the User Group section and the Fields section will be enabled. The user can do the mapping for the user or group here.
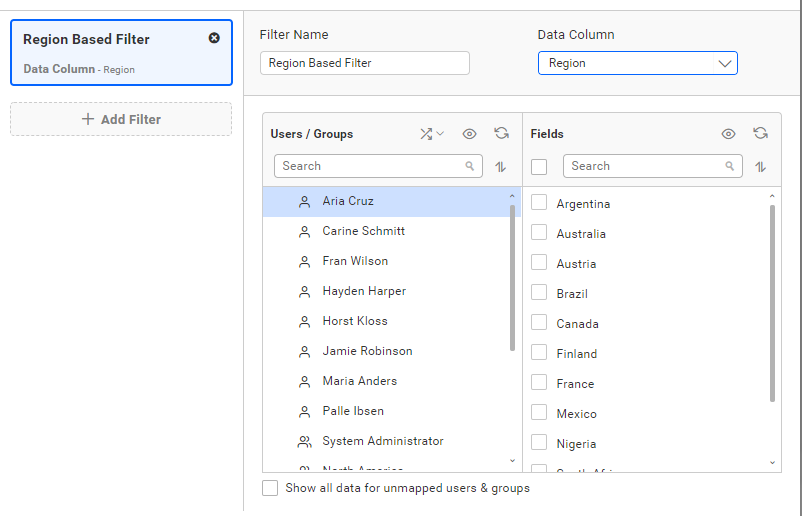
The selected column and the name of the filter will be shown in the tile on the left.
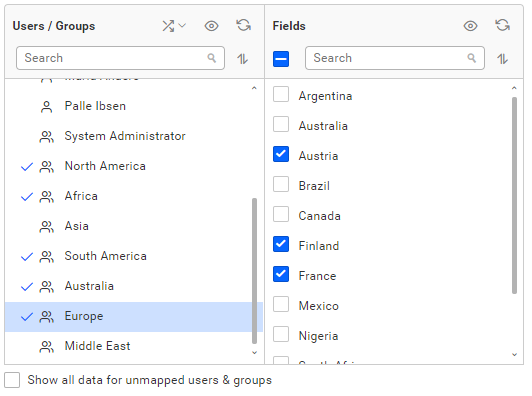
The filter can be set for each user or group by selecting the user or group and checking the required value in the fields section. In this example, we are focusing on applying the filter for the groups so that all users in the group will have data restrictions applied.
Users/Groups
All active users and groups on the Bold BI server will be listed. Users will be listed at the top followed by the groups.
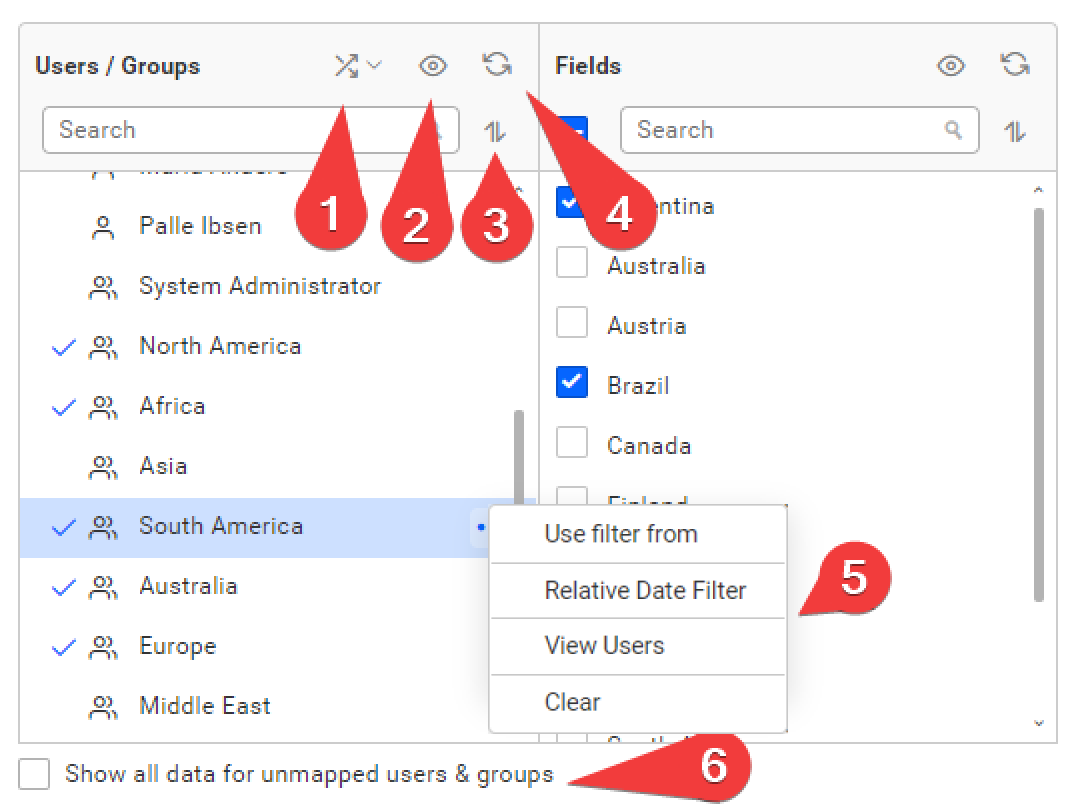
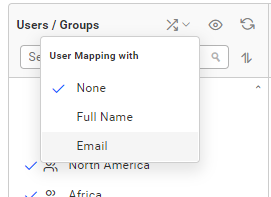
Auto Mapping based on user email / full name (1)
When creating a data source with a column containing user email, full name, or group name, the auto map feature can be used to assign the filter automatically. This can be set by selecting the data column, clicking on the Auto Mapping icon, and selecting the type from the menu.
You can manually assign different values to users or groups as well, even after setting auto mapping. For those users or groups, the selected data will be shown.
To remove auto mapping, choose the None option from the menu.
NOTE: The mapping will only be shown in the UI if the settings match a result. If not, no indication will be shown.
Filter(2)
Users and groups can be filtered using the filter icon to show all, mapped, or unmapped users and groups. Users are sorted in ascending order by default.
Sort(3)
The users are sorted in ascending order by default, and this can be toggled using the sort icon.
Refresh(4)
The user group list can be refreshed to get the latest list of users and groups from the server by clicking on the refresh icon. The configured settings will not be reset during this action.
More Options(5)
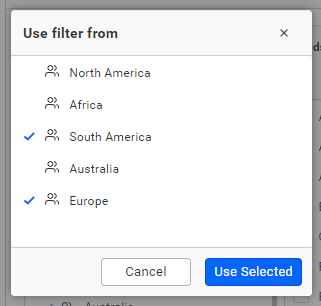
Use filter from
You can merge or copy the settings applied to another user or group by using the Use filter from option in the view. A dialog will pop up listing the users or groups that have the mapping configured. You can choose one or more users to merge with the selected user or group.
Relative date filter
-
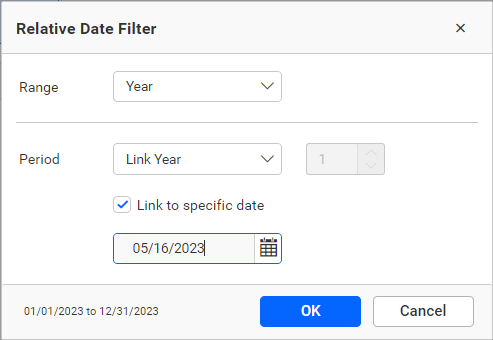
When working with the User Filter module, you can apply the Relative Date Filter to a date column. Once you select a date column, the Relative Date Filter option becomes enabled.
-
This feature allows you to choose from a variety of predefined relative periods, such as Today, Yesterday, Last Week, Last Month, and more.
The Relative Date Filter dynamically calculates the periods based on the current date. For example, if you select “Last Week” as the relative period, the filter automatically includes data from the previous week.
When using the Relative Date Filter in the User Filter module, you can preview its impact on specific users or groups. This feature allows you to select the desired user or group and observe how the filter affects the displayed data. By reviewing the preview, you can ensure accurate data filtering within the chosen time periods for the intended users or groups.
View Users
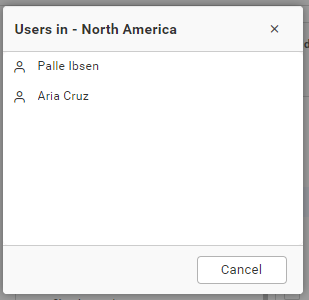
You can view the list of users who are present in a group by using the View Users option.
A dialog will pop up listing the users that belong to the group.
IMPORTANT: If a user is present in multiple groups, the user will be able to see the data mapped in all the groups while viewing the dashboard.
Clear
You can remove the settings applied for the user by clicking the Clear option.
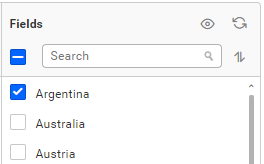
Fields
The values of the column selected as the data column will be listed in the fields section. The action icons in the field section have the same behavior as those in the user group list section.
Inverting the data restriction
By default, when a user is not mapped with any data in the user filter, no data will be shown to the user when the dashboard is viewed. There will be cases where you will have to apply the restriction to a few users and let other users see the full data.
This can be achieved by checking the Show all data for unmapped users or groups option. Checking this option will remove the filter restriction for all the unmapped users or groups. Only the users who have any filter configured will see the restricted data. All other users will be able to see the data without any restrictions.
NOTE: When multiple filters are created for the data source, make sure to check the Show all data for unmapped users or groups option if the user has no mapping set in that filter setting. Failing to do so will result in a No data available message being shown to that user.
Create User Filter Via Rest API - Manual Mode
Using the Rest API, add the user filter to the data source.
-
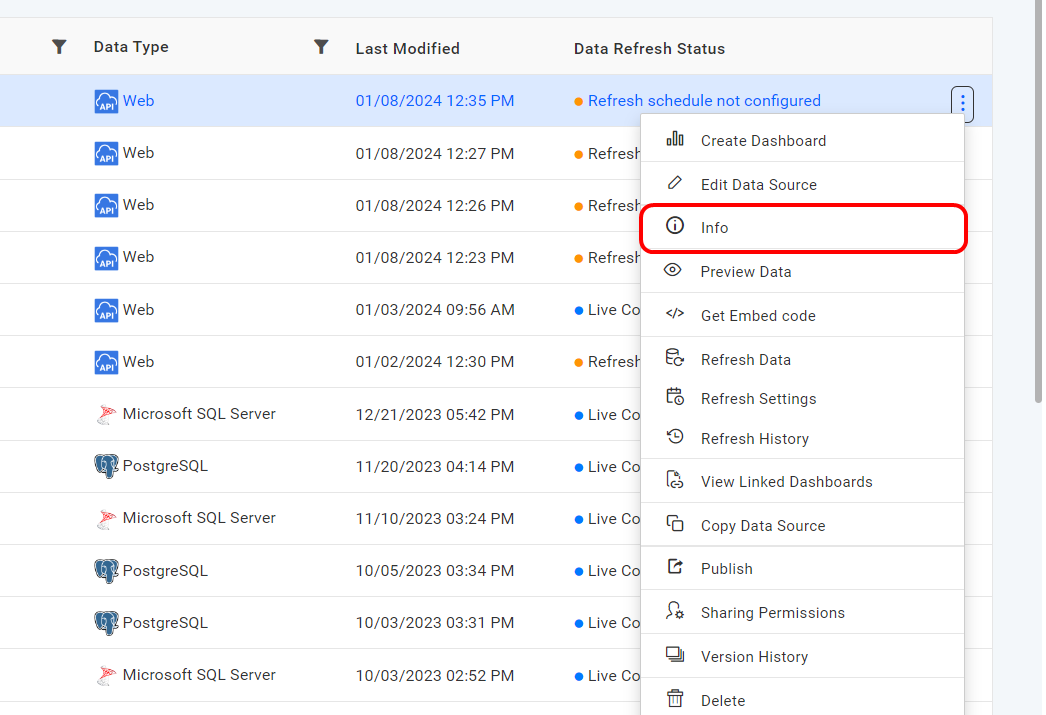
To get the item ID, click the three dotted option and choose info.
-
You can pass the values in JSON format.
If we don’t give the “BasedOn” and “Mode”, it will assign a default value as “BasedOn”:“None” and “Mode”:“Auto”.
- Using the Name option, we can give the filter a name.
Parameters for adding user filter
| Parameters | Details | Applicable Values |
|---|---|---|
| Mode Mandatory | Default (Manual) | string |
| IsGroup Optional data | Denotes the user is Group or not. | Boolean |
| IsCheckAll Optional data | It represents whether all values in the column need to be checked for filtering. | Boolean |
SelectedValues Mandatory | It represents the values in the columns that are going to be fetched using a filter. | string |
| IncludeFutureValues Optional data | It represents the values; items will be added in the future. | Boolean |
| RelativeDateFilter Optional data | It represents the value from which we are going to fetch data using relative filter options in the Date column. | string |
| UserId Mandatory | It represents the user ID we use for Bold BI to fetch Data using filter. | string |
| ShowRecordsToUnmappedUsers Optional | It represents the data that needs to be shown to other users in Bold BI. | Boolean |
| ColumnId Mandatory | It represents the column we are going to use for filtering. | string |
| Name Mandatory | It represents the name were going to assign for the filter. | string |
| BasedOn Mandatory | It represents the value needed to set the column with the user email, full name, or group name as the data column for the filter. | String (None, FullName,Email,GroupName) |
| GroupId Optional data | It represents the user Group we use for Bold BI to fetch Data using filter. | string |
NOTE:
- Please note that the UserId or GroupId listed in the above JSON should be used in Bold BI as users or groups.
- Currently, the User filter API is supported only for Manual mode.
Sample for creating User Filter via Rest Api using group Id
{
    "BasicFilters": [
        {
            "Mode": "Manual",
            "UserInfo": [
                {
                    "IsGroup": true,
                    "IsCheckAll": false,
                    "SelectedValues": [
                        "12345"
                    ],
                    "IncludeFutureValues": false,
                    "RelativeDateFilter": null,
                    "UserId": null,
                    "GroupId": "string"
                }
            ],
            "ShowRecordsToUnmappedUsers": true,
            "ColumnId": "string",
            "Name": "string",
            "BasedOn": "None"
        }
    ],
    "AdvancedFilter": null
}
Sample for creating User filter with relative date
{
    "BasicFilters": [
        {
            "Mode": "Manual",
            "UserInfo": [
                {
                    "IsGroup": false,
                    "IsCheckAll": false,
                    "SelectedValues": [],
                    "IncludeFutureValues": false,
                    "RelativeDateFilter": {
                        "RelativeDateFormat": "Month",
                        "DateInstance": "Past",
                        "StartDate": "07/25/1996 12:00 AM",
                        "EndDate": "10/24/1996 11:59 PM",
                        "Range": 3,
                        "UseAnchorDate": true,
                        "AnchorDate": "10/19/1996"
                    },
                    "UserId": "user@domain.com"
                }
            ],
            "ShowRecordsToUnmappedUsers": true,
            "ColumnId": "string",
            "Name": "string",
            "BasedOn": "None"
        }
    ],
    "AdvancedFilter": null
}