Azure Active Directory B2C
This section explains steps to configure Azure AD B2C Single Sign-On (SSO) in the Bold BI application. Before integrating Azure AD B2C with Bold BI, ensure the Configure Azure AD B2C tenant in Azure portal is done.
Configure Azure AD B2C in User Management Server
-
In Bold BI Settings, click on
Authenticationand select theAzure AD B2Ctab.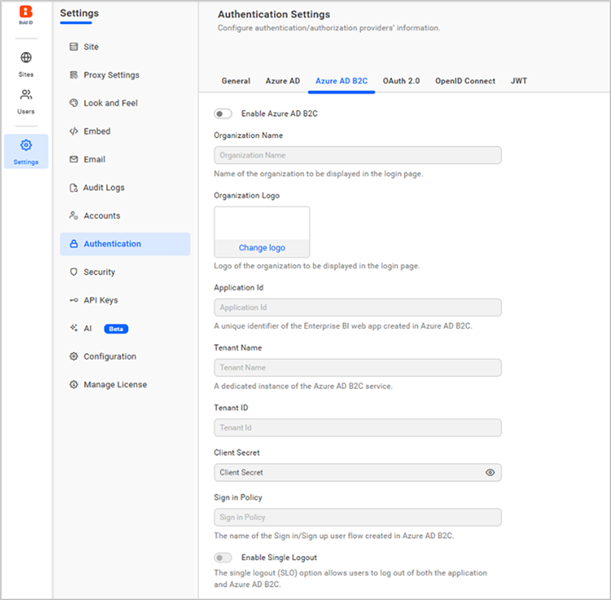
-
Enable Azure AD B2Cand enter the required details.Organization Name The name of your organization to be displayed on the login page. Organization Logo The logo of your organization to be displayed on the login page. Application ID A unique identifier for the Enterprise BI web application registered in Azure AD B2C. Tenant Name The name of your Azure AD B2C tenant, representing a dedicated instance of the Azure AD B2C service. Tenant ID The unique identifier (GUID) of your Azure AD B2C tenant. Client Secret The secret key generated for the Azure AD B2C application, used to authenticate secure communication. Sign-in Policy The name of the user flow (sign-in/sign-up policy) configured in Azure AD B2C for managing user authentication. Enable Single Sign-Out Enables single sign-out functionality, ensuring users are logged out of all connected applications when they sign out.
Where to get Azure AD B2C settings
-
In the Azure AD B2C tenant, under
Overview, select the tenant’s name from the domain name.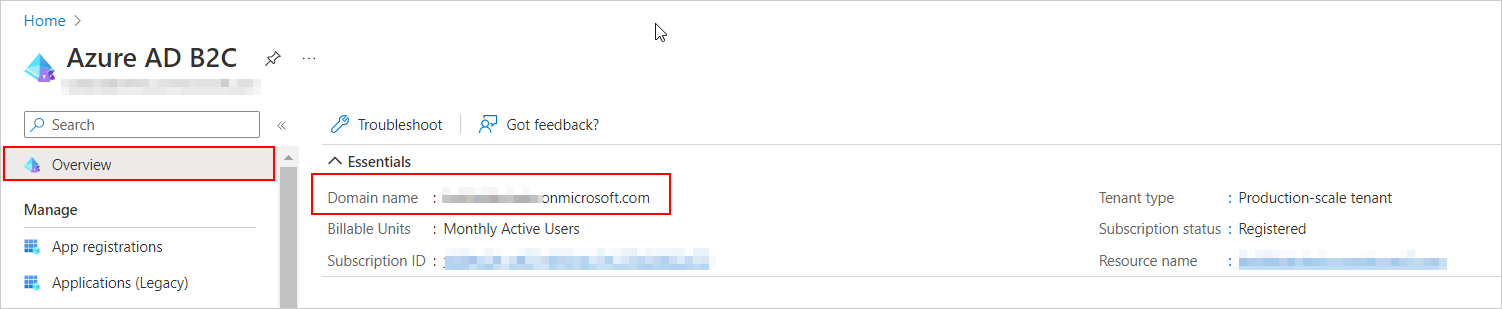
-
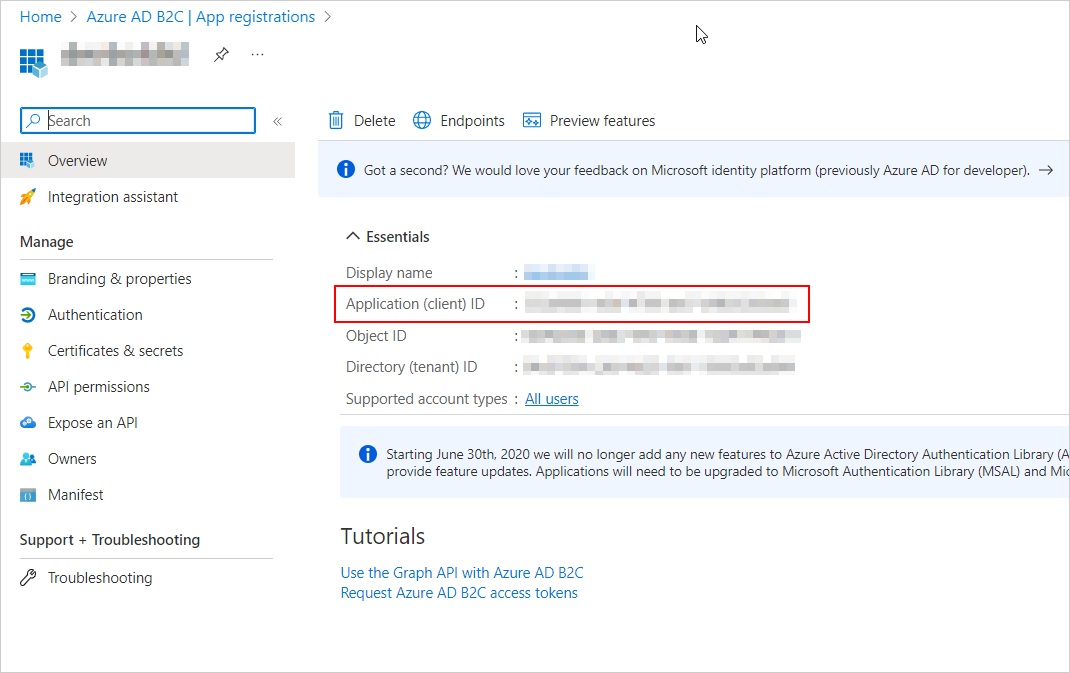
Select the registered application, obtain the application ID, and provide the created user flow.
-
Select the registered application, obtain the Tenant ID.

-
Select the registered application, under
Manage, click theCertificates & secretsand copy the value ofClient Secret.
Set Azure AD B2C as default authentication
Azure AD B2C can be set as the default authentication when the Azure AD B2C settings are enabled. Follow these steps to configure the default authentication.
-
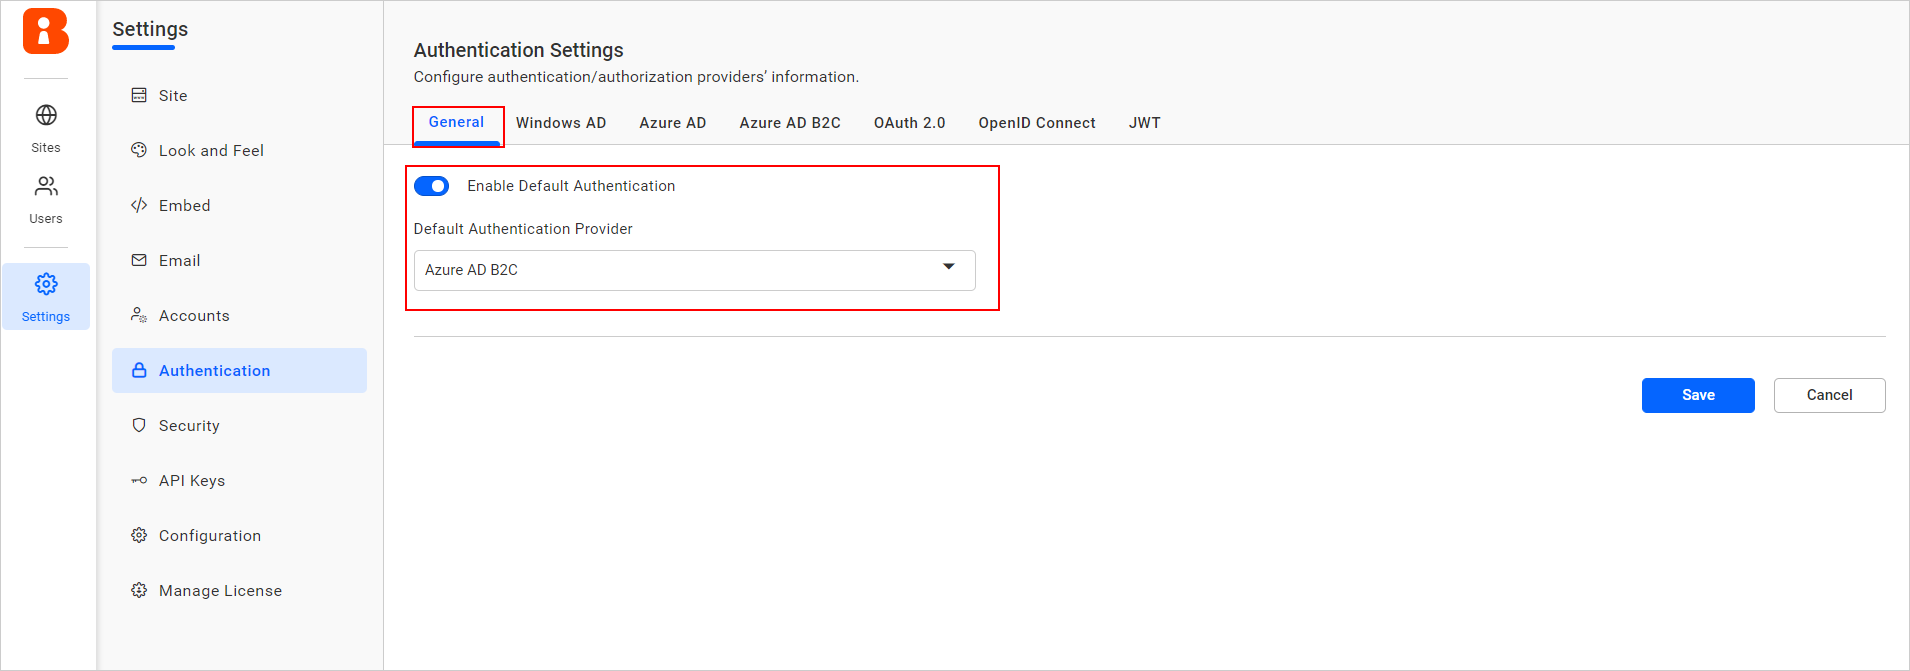
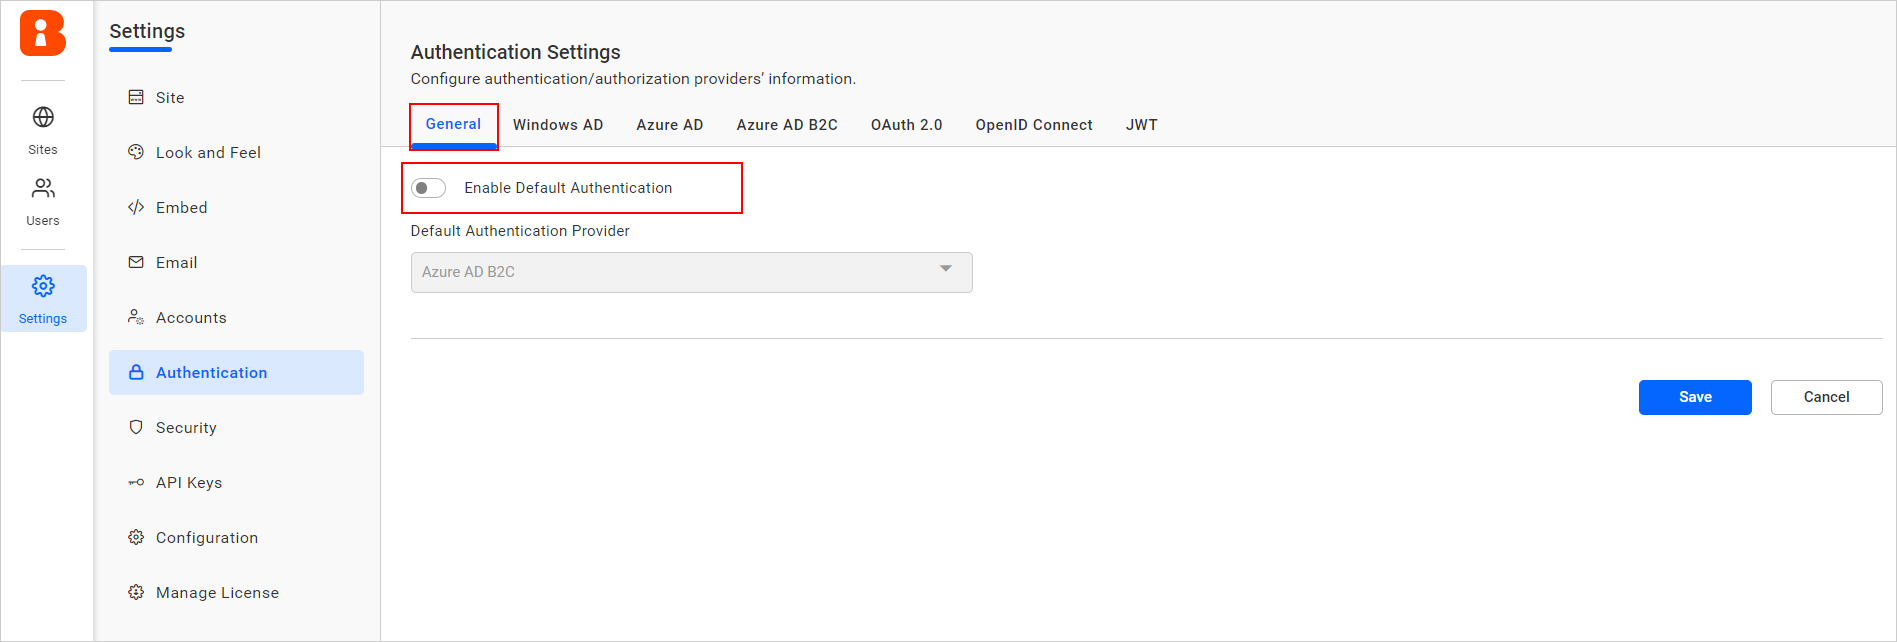
On the settings page, click the
Authenticationtab and selectGeneral. -
Enable the Enable Default Authentication option and select Azure AD B2C as the default authentication provider as shown in the following screenshot.
Disabling Azure AD B2C connect settings
Disabling the Enable Default Authentication option and then clicking Save will disable the Azure AD B2C default authentication.
Configure Azure AD B2C tenant in Azure portal
You have an Azure subscription for configuring the Azure AD B2C tenant in the Azure portal. If you don’t have one, please create free account.
NOTE: For comprehensive information on configuring Azure AD B2C, refer to the official B2C documentation, which includes tutorials on creating a B2C tenant, registering applications, and more.
Create Azure AD B2C Tenant
To create an Azure AD B2C tenant, please refer to the link Create Azure AD B2C Tenant.
Register a web application
After creating an Azure AD B2C tenant, please follow these steps to register a new application into the tenant:
-
Select
App registrationin the left side menu, chooseNew Registration, and give your app a new name. -
Select
Accounts in any identity provider or organizational directory (for authenticating users with user flows)under Supported account types. -
Under Redirect URI, select
Web,then enter the URL of the Bold BI application. Examplehttps://localhost:5000. -
Under Permissions, select the “Grant admin consent to OpenID and offline_access permissions” check box, and then select Register.
-
Select the registered application, under
Manage, chooseAuthentication, then select theAccess tokens (used for implicit flows)check box and save the changes.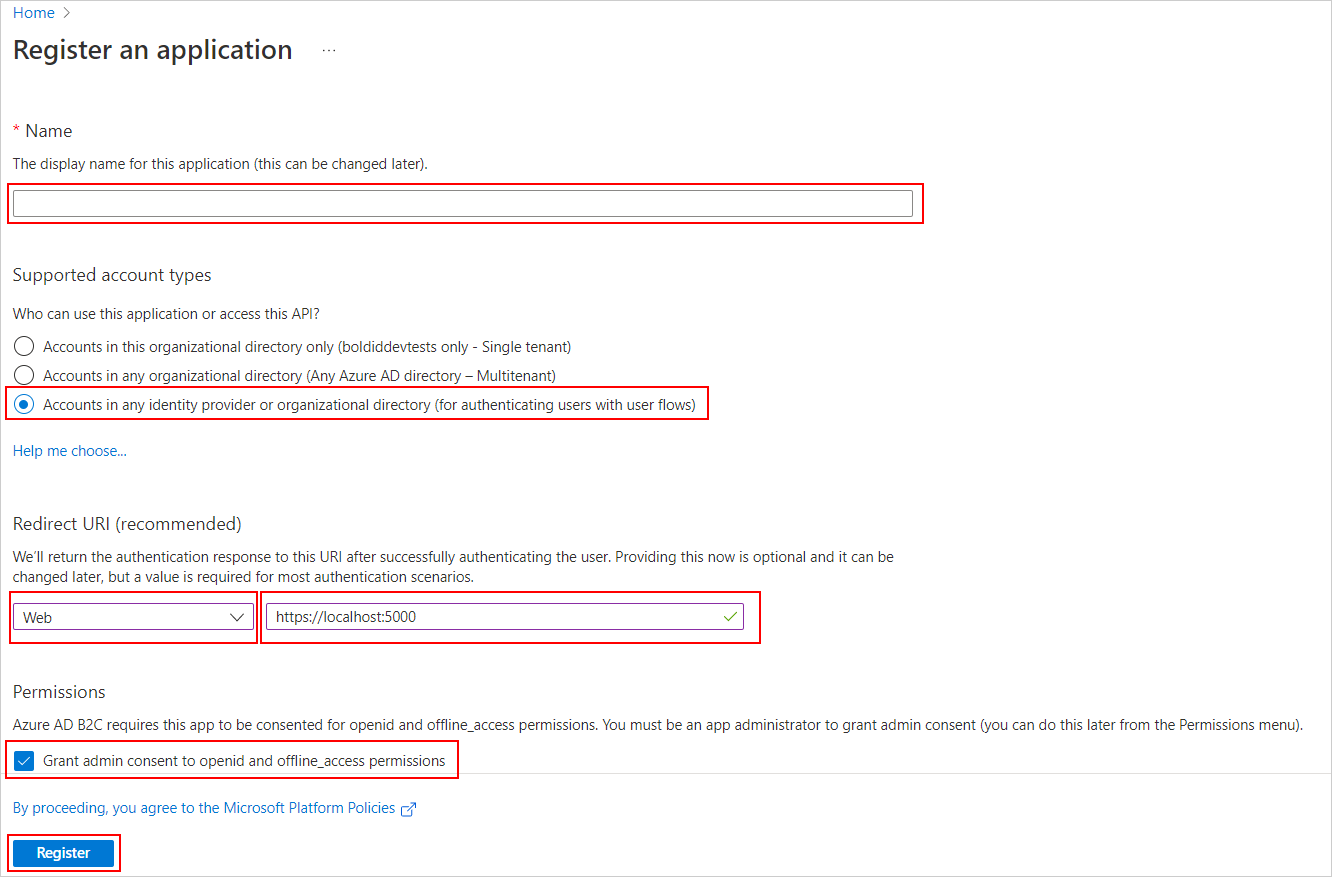
Create user flow
NOTE: In creating user flow, support is provided for the
sign up and sign inorsign inoptions.
-
Go to
Policies, selectUser flows, and then click+ New user flow. -
Select
Sign up and sign inorsign inisRecommended, and clickCreate.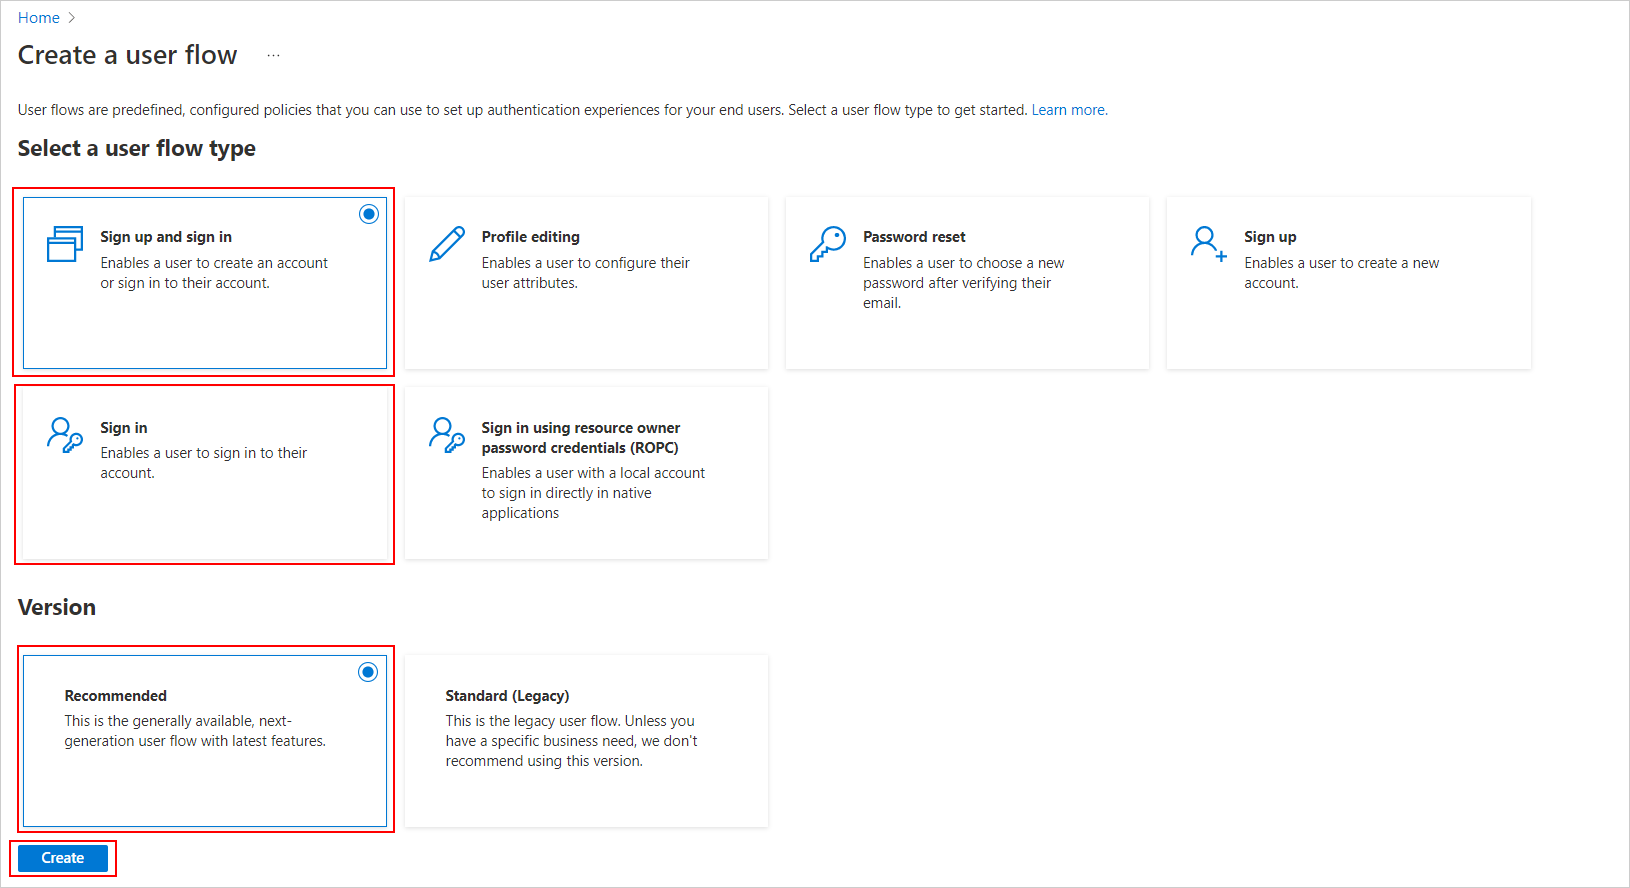
-
After that, complete the following configuration of user flow creation:
Name: Enter a name for the flow, for example, signupsignin1.
Local accounts: Select Email Sign up.
User attributes and token claims: Select the listed attributes that will be collected from the user during sign-up and select the claims that will be returned in the token. Please ensure the mentioned claims are selected.
Email Address Email address of the user. Email Addresses Email addresses of the user. Given Name The user's given name (also known as first name). Surname The user's surname (also known as family name or last name). User's Object ID Object identifier (ID) of the user object in Azure AD. 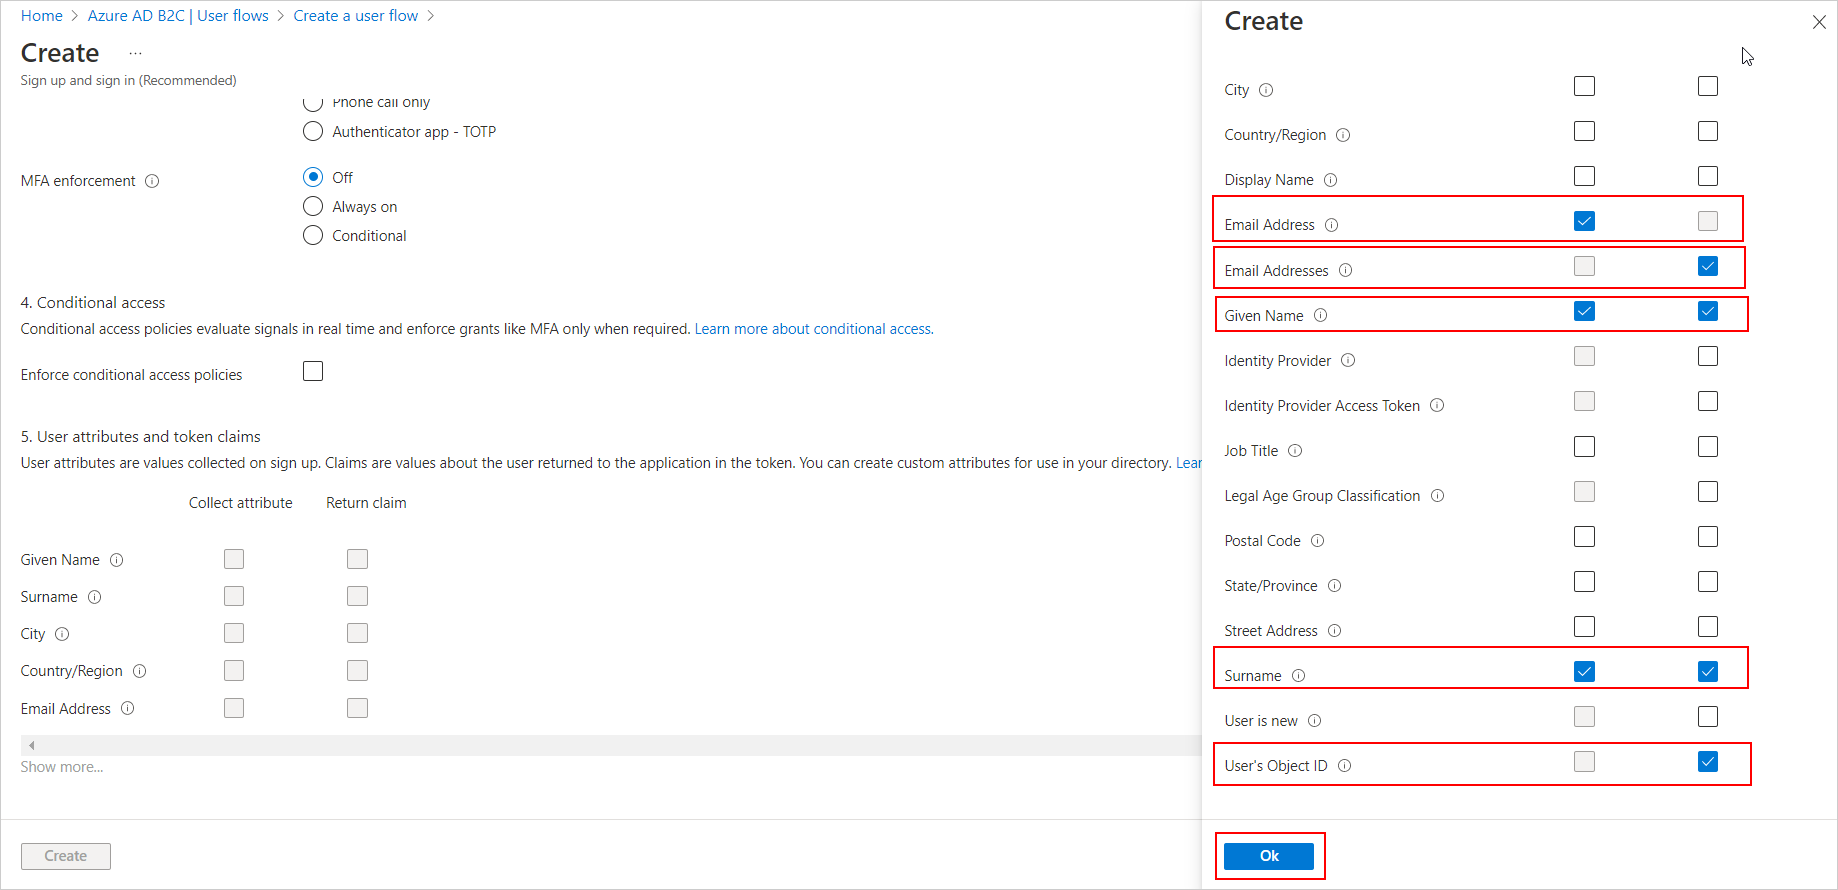
-
Select the policy and the
application claimson the left side. Then, ensure that the following items are selected. If they are not, make sure to select and save the changes.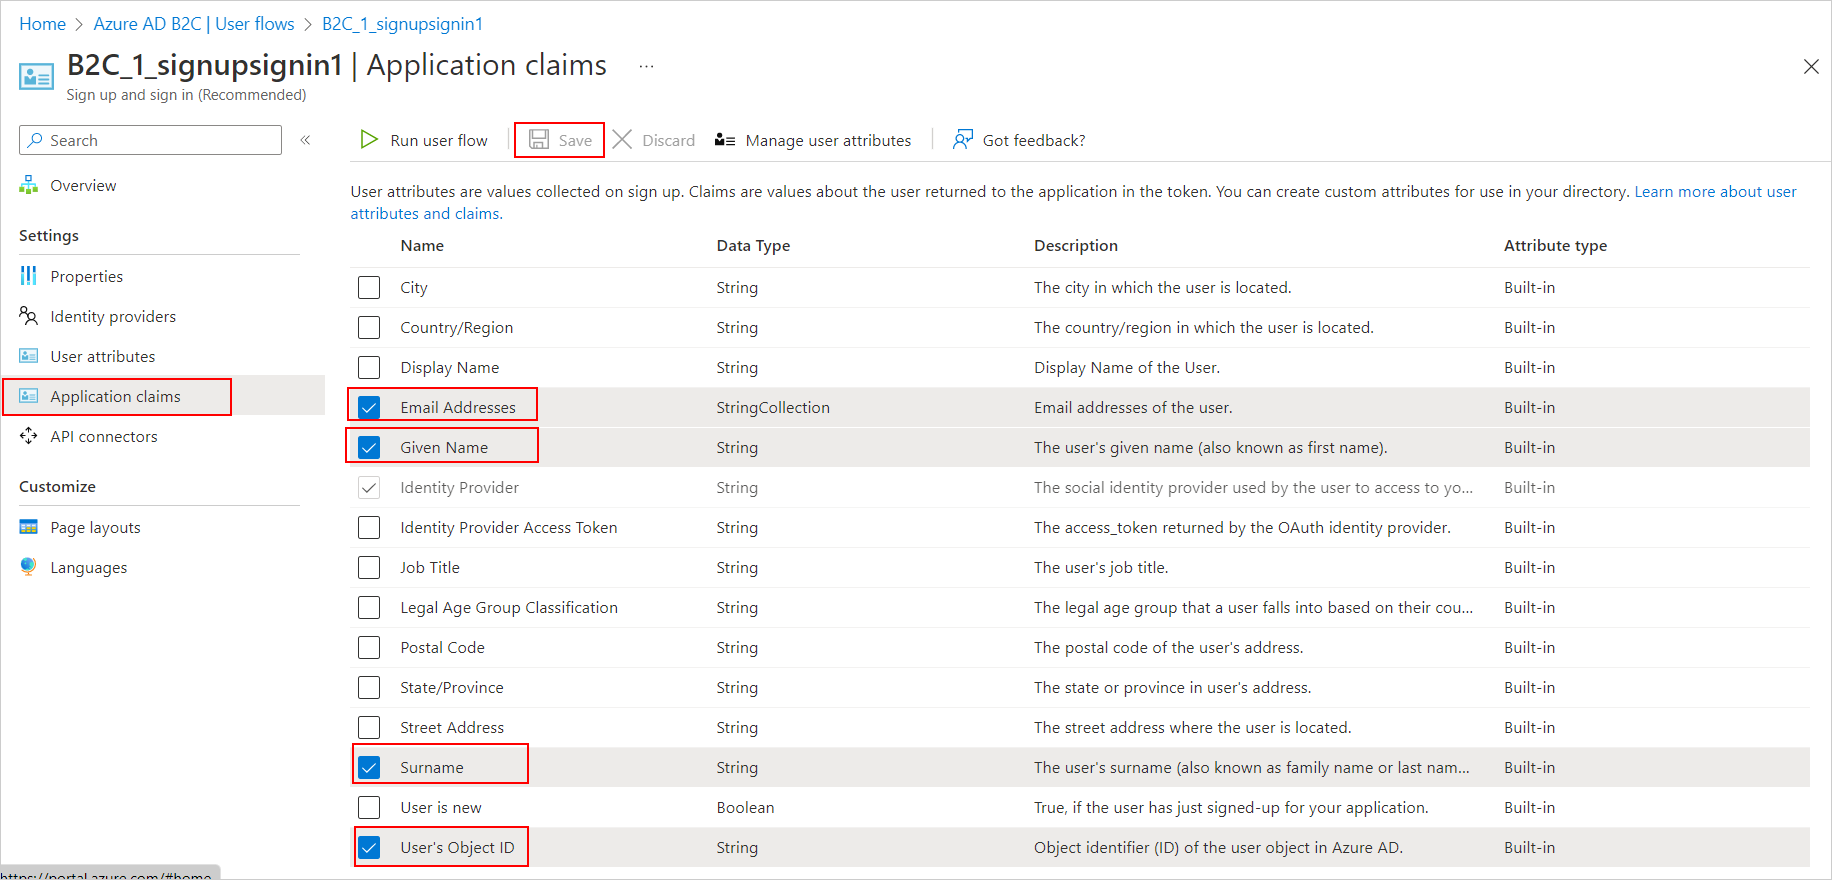
Create Client Secret
NOTE: The client secret is a credential used by your Bold BI application to securely authenticate with Azure AD B2C.
-
Go to
Azure AD B2C, selectApp registrations, and choose the application you registered (for example,Boldbi-auth). -
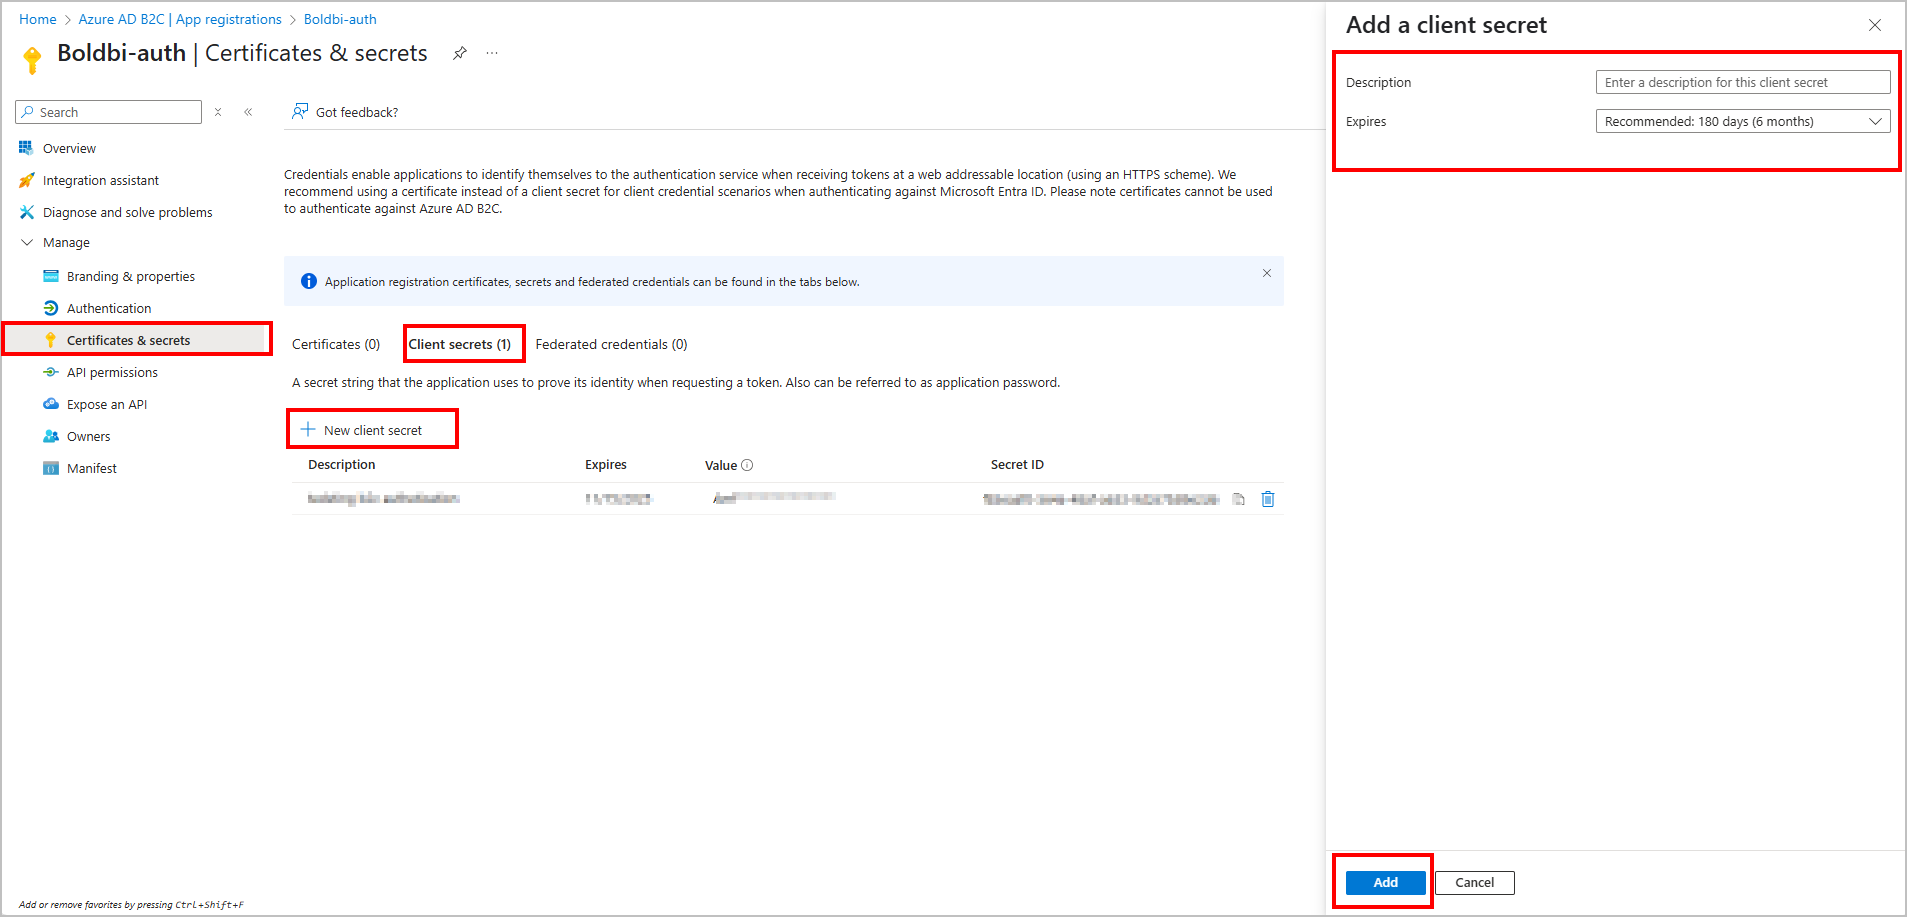
In the left panel, click
Certificates & secrets, then under the Client secrets tab, click+ New client secret. -
In the Add a client secret pane, configure the following:
- Description: Enter a meaningful description (e.g.,
Bold BI Client Secret). - Expires: Select a suitable expiry period (e.g., 6 months, 12 months, or 24 months).
- Description: Enter a meaningful description (e.g.,
-
Click the
Addbutton to generate the secret.
-
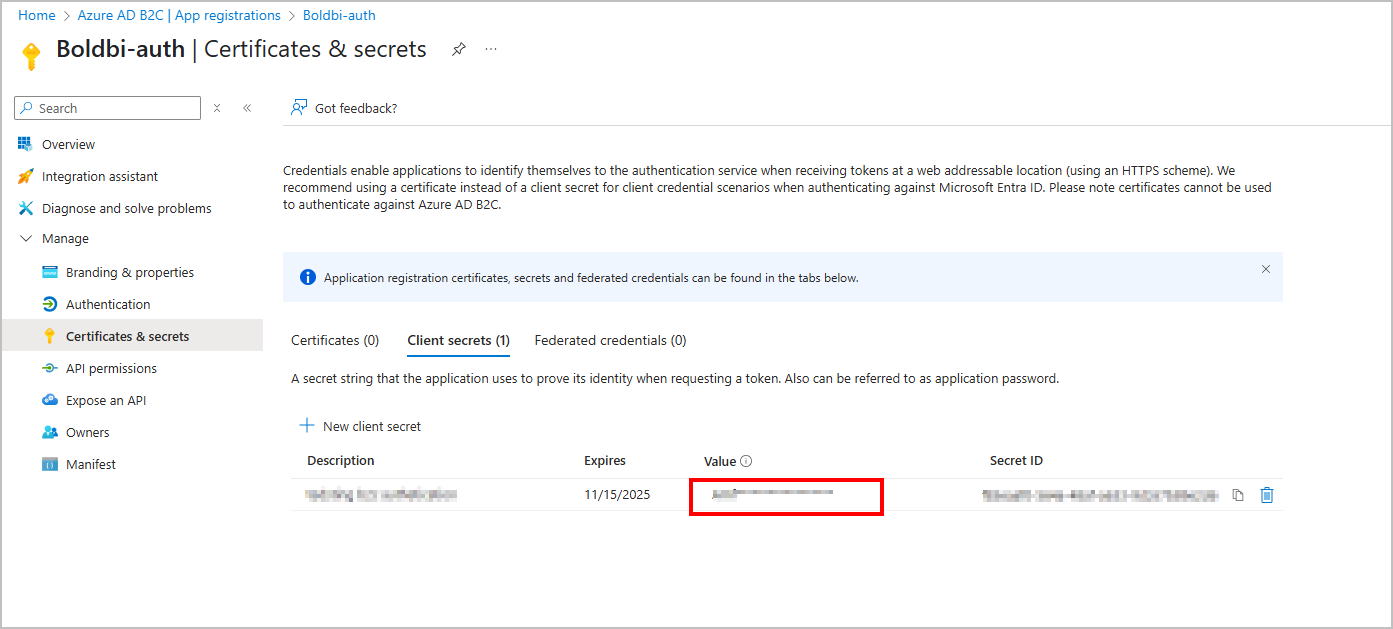
After creation, copy the Value immediately. This is your Client Secret, which should be added to the Bold BI Azure B2C settings.
⚠️ Important: The client secret value is visible only once, immediately after creation. Save it securely in a password manager or secure vault.
Add User.Read.All Permission to Azure AD B2C App
Follow the steps below to add the User.Read.All permission in Azure AD B2C through the Azure portal:
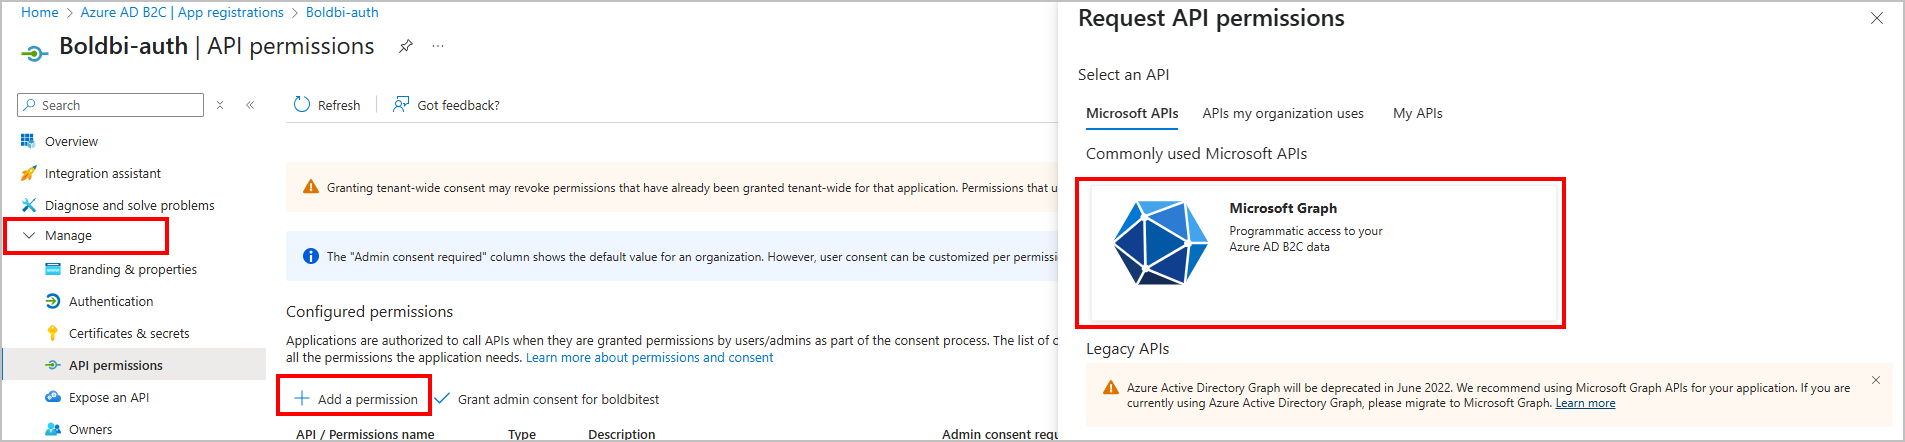
- Go to
Azure AD B2C, selectApp registrations, and choose the application you registered (for example,Boldbi-auth). - In the left pane, select API permissions.
- Click on + Add a permission.
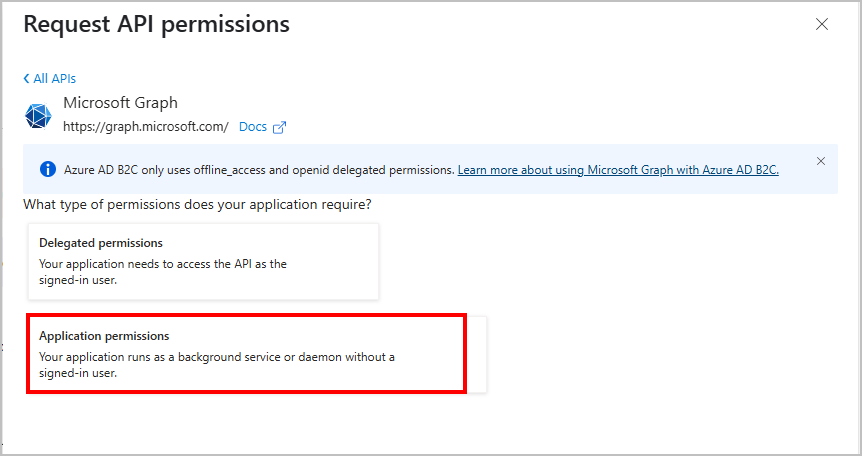
- In the right pane, choose Microsoft Graph.
- Choose Application permissions.
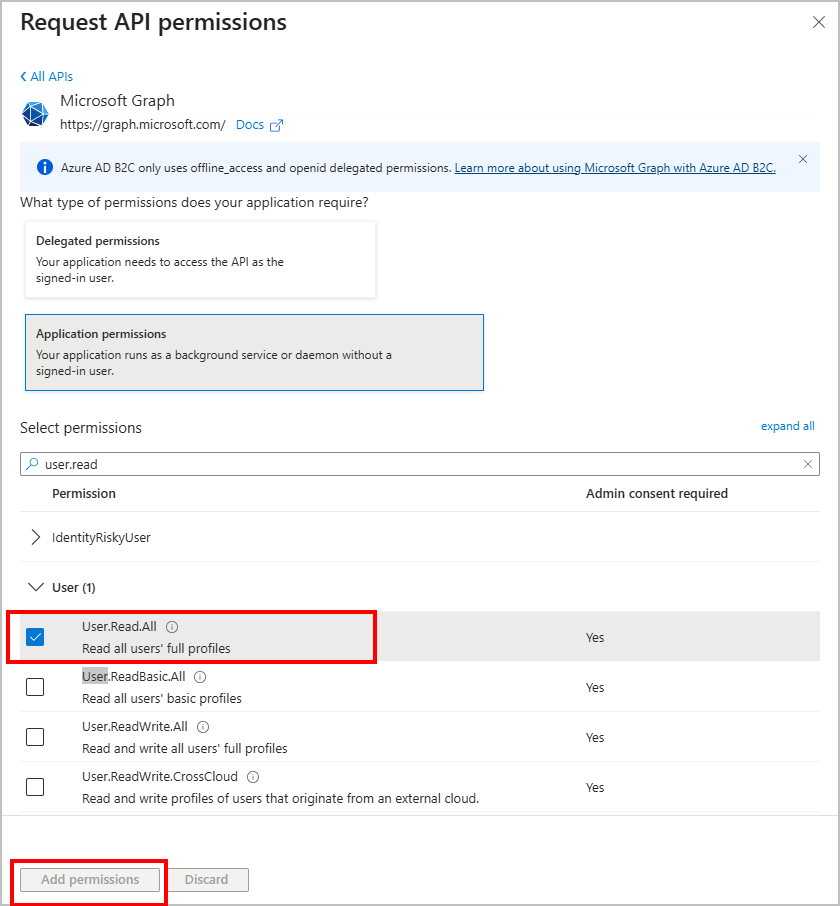
- In the search box, type
user.read. - Expand the User section.
- Check the box for User.Read.All - “Read all users’ full profiles”.
- Click on Add permissions.
- After adding, click Grant admin consent for your tenant name and confirm to apply the permissions.
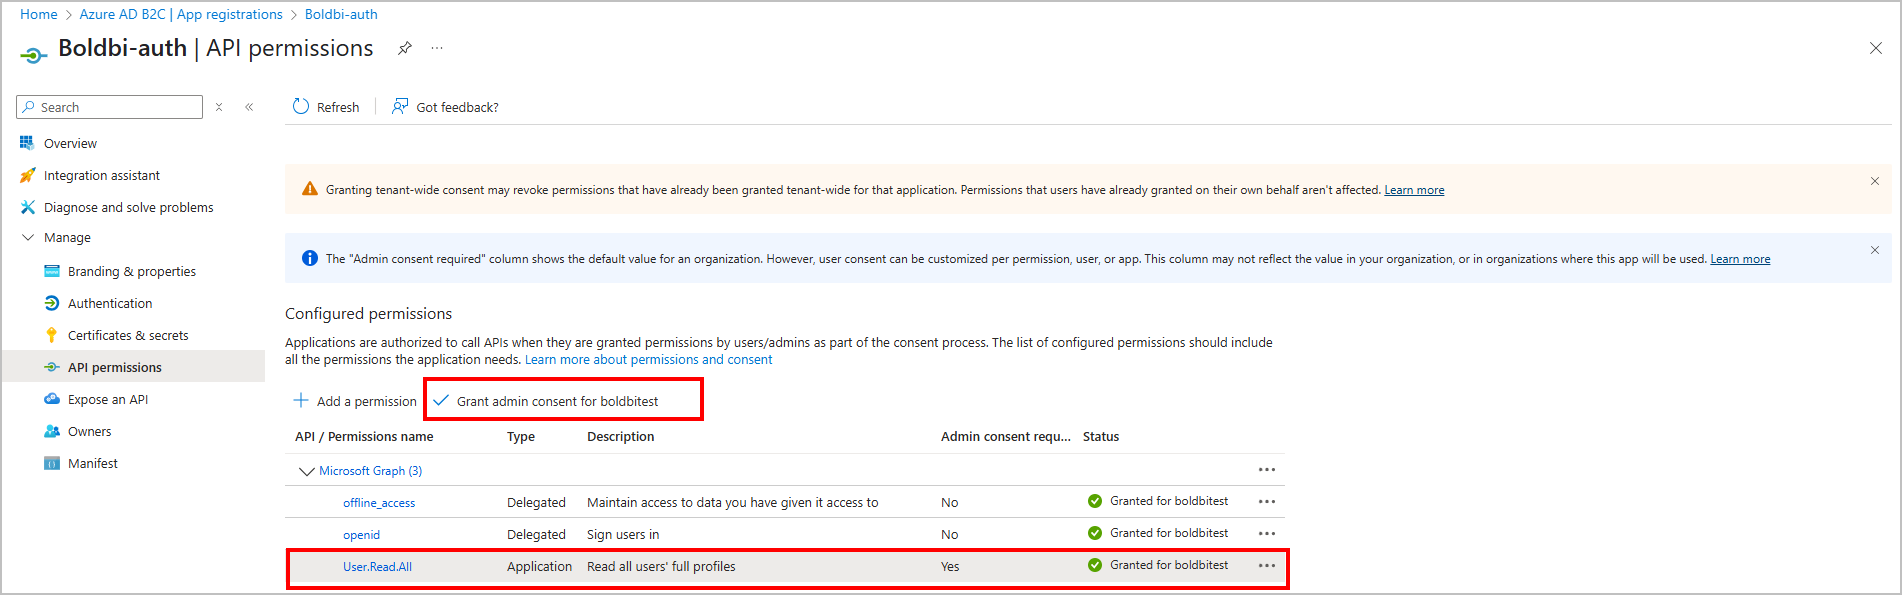
✅ The
User.Read.Allpermission requires admin consent. Ensure that it is granted after adding.