Building dashboard app in VueJs with Go using Embedded SDK
A GitHub link has been provided to get the sample application, which illustrates the rendering of the dashboard that is accessible on your Bold BI server. This is followed by a set of steps to create a new embedding application in VueJs with Go on your own.
NOTE: The best way to get started would be to read the Getting Started section of the documentation. The
Getting Startedguide provides you with enough information that you need to know before working on the sample.
How to run the sample
-
Please get the VueJS with Go Application.
-
Please ensure that you have enabled embed authentication on the
embed settingspage. If it is not enabled, please follow the provided instructions or refer to the image below for guidance on how to enable it.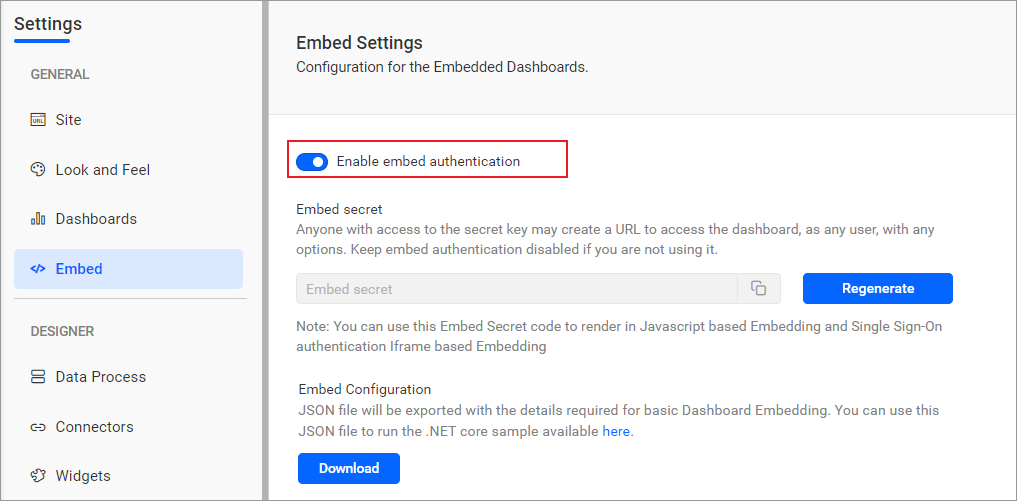
-
Please use this link as a reference to download the
embedConfig.jsonfile. Additionally, you can refer to the following image for visual guidance.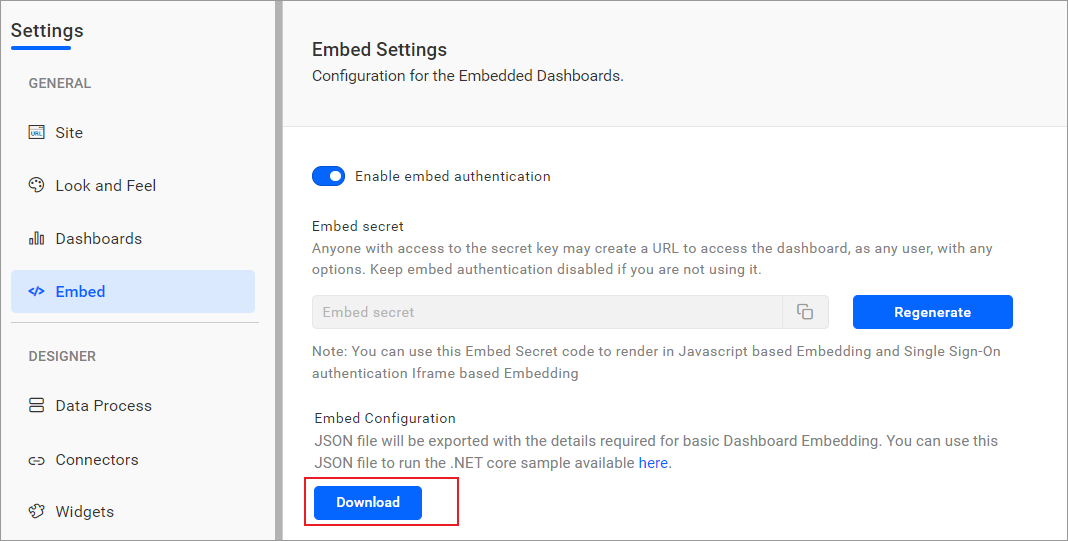
-
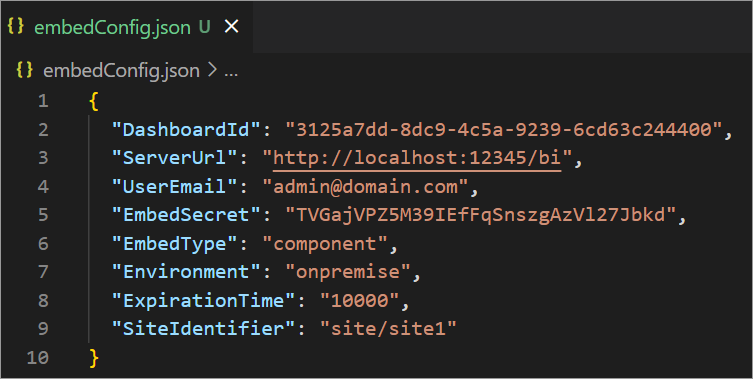
Please copy the downloaded
embedConfig.jsonfile and paste it into the designated location within the application. Please ensure that you have placed it in the application as shown in the following image.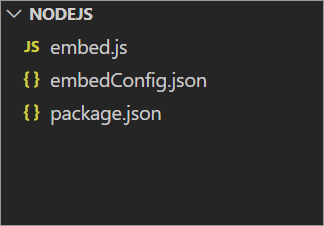
ServerUrl Dashboard Server BI URL (ex: http://localhost:5000/bi, http://demo.boldbi.com/bi) SiteIdentifier For Bold BI Enterprise edition, it should be like site/site1. For Bold BI Cloud, it should be empty string.Environment Your Bold BI application environment. (If it is cloud analytics server, use BoldBI.Environment.Cloud; if it is your own server, useBoldBI.Environment.Enterprise).DashboardId Item id of the dashboard to be embedded in your application. EmbedSecret Get your EmbedSecret key from the Embed tab by enabling the Enable embed authenticationin the Administration pageUserEmail UserEmail of the Admin in your Bold BI, which would be used to get the dashboard ExpirationTime Token expiration time. (In the EmbedConfig.json file, the default token expiration time is 10000 seconds) -
Open the
Gosample in Visual Studio Code. -
To run the back-end
Gosample, use the following commandgo run tokengeneration.go. -
Open the
Vuesample in a new window of Visual Studio Code. -
To install all dependent packages, use the following command:
npm install. -
Please run your
Vuesample using the following command:npm run serve.
How this sample works
-
When the
mountedfunction is triggered in a front-end React application, it invokes the/getdetailsendpoint. This endpoint fetches data from theembedConfig.jsonfile. If the JSON file cannot be found, an error message will be shown.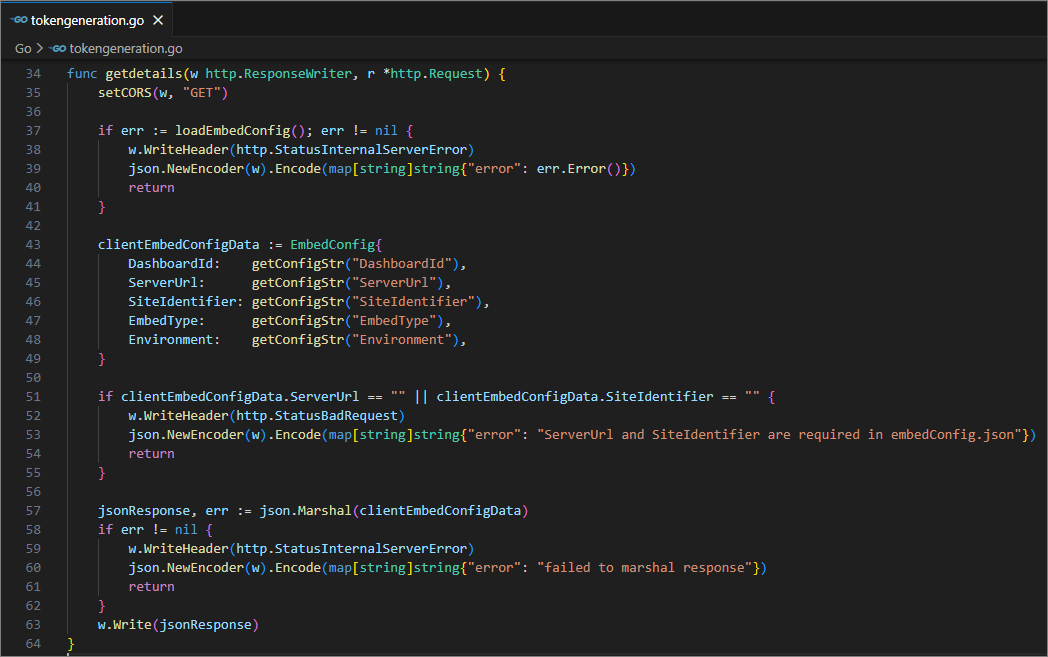
-
The dashboard will be rendered using the data obtained from the
/getdetailsendpoint.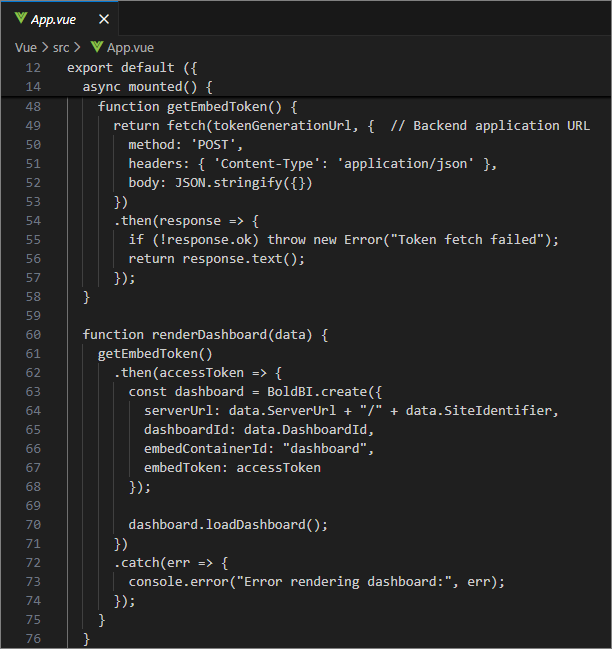
-
Before rendering, the
tokenGenerationUrlis called, which redirects to thetokenGenerationaction. This action generates the response of dashboard details with token.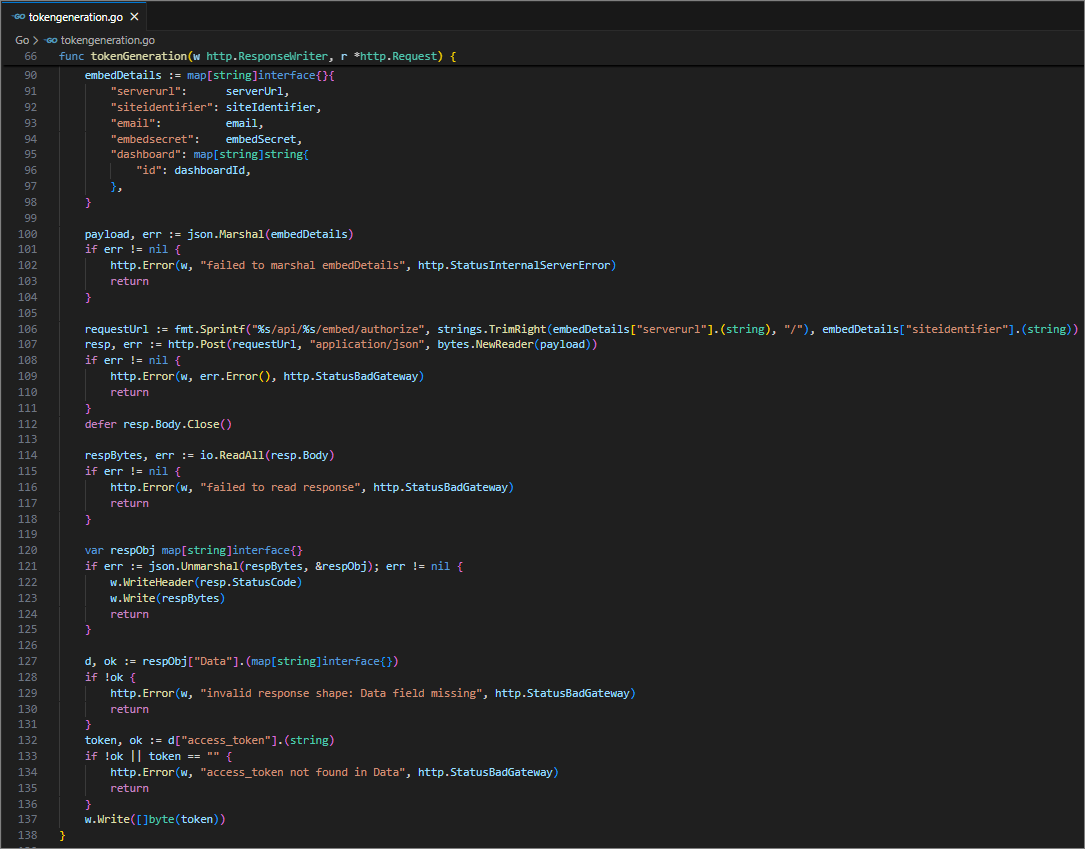
-
Once the token is generated, it will be returned to the
App.vuefile and the dashboard will start to render it.
Steps to create new VueJs with Go application to embed dashboard
-
To create the Vue application, run the command
vue create my-app. In this case,my-apprefers to the folder name of the Vue application. -
Open the created folder in Visual Studio Code and change the directory by running the command
cd my-app. -
Download the VueJs with Go sample and open the VueJS in Visual Studio Code using the
EmbedBIWrapper.jsfile. Import it in theApp.vueas follows.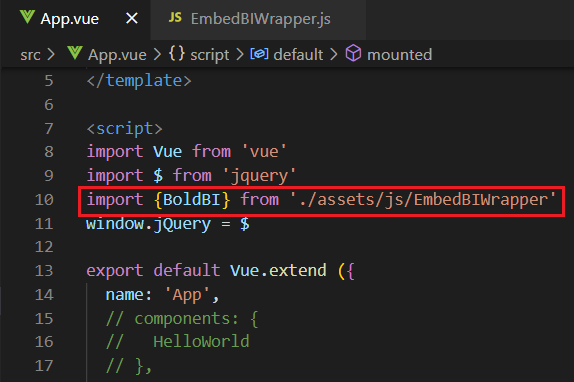
-
In the
App.vuefile, create a DOM element with the iddashboardand include the necessary cdn files and properties to render the dashboard.mounted: function() { var scripts = [ "https://cdn.jsdelivr.net/npm/vue@2.5.16/dist/vue.js", "https://cdn.boldbi.com/embedded-sdk/v15.2.6/boldbi-embed.js" ]; scripts.forEach(script => { let tag = document.createElement("script"); tag.setAttribute("src", script); tag.setAttribute("type", "text/javascript"); tag.setAttribute("defer", "defer"); tag.async = true; document.head.appendChild(tag); }); let rootUrl = "http://localhost:64503/bi"; let siteIdentifier = "/site/site1"; let dashboardId = "2426b843-bf97-4392-96b1-ef12c007b66f"; let environment = "enterprise"; let authorizationUrl = "http://localhost:8086/getDetails"; let dashboard = BoldBI.create({ serverUrl: rootUrl + siteIdentifier, dashboardId: dashboardId, embedContainerId: "dashboard", embedType: BoldBI.EmbedType.Component, environment: BoldBI.Environment.Enterprise, // If Cloud, you should use BoldBI.Environment.Cloud mode: BoldBI.Mode.View, width: "100%", height: window.innerHeight + "px", expirationTime: 100000, authorizationServer: { url: authorizationUrl } }); dashboard.loadDashboard(); } -
To install GO, you can then install the Visual Studio Code extension.
-
Please create a folder in the desired location and open it in Visual Studio Code. Next, create a file named
main.goandlaunch.json, and include the following code.{ // Use IntelliSense to learn about possible attributes. // Hover to view descriptions of existing attributes. // For more information, visit: https://go.microsoft.com/fwlink/?linkid=830387 "version": "0.2.0", "configurations": [ { "name": "Launch", "type": "go", "request": "launch", "mode": "debug", "program": "${workspaceRoot}", "env": {"FLASH_PORT": 8086}, "args": [], "showLog": true } ] } -
In the
main.gofile, include the following code to contact the BOLD BI server.package main import ( "crypto/hmac" "crypto/sha256" "encoding/base64" "encoding/json" "io/ioutil" "log" "net/http" "strings" ) //Set EmbedSecret key from Bold BI Server. Please refer this link(https://help.syncfusion.com/bold-bi/on-premise/site-settings/embed-settings) var embedSecret = "enter embed secret here" //Enter your BoldBI Server credentials. var userMail = "enter user email here" func main() { http.HandleFunc("/getDetails", getEmbedDetails) log.Fatal(http.ListenAndServe(":8086", nil)) } func getEmbedDetails(w http.ResponseWriter, r *http.Request) { w.Header().Set("Context-Type", "application/x-www-form-urlencoded") w.Header().Set("Access-Control-Allow-Origin", "*") w.Header().Set("Access-Control-Allow-Methods", "POST") w.Header().Set("Access-Control-Allow-Headers", "Content-Type") body, err := ioutil.ReadAll(r.Body) if err != nil { log.Fatalln(err) } if len(body) > 0 { if queryString, err := unmarshal(string(body)); err != nil { log.Println("error converting", err) } else { serverAPIUrl := queryString.(map[string]interface{})["dashboardServerApiUrl"].(string) embedQueryString := queryString.(map[string]interface{})["embedQuerString"].(string) embedQueryString += "&embed_user_email=" + userMail signatureString, err := getSignatureUrl(embedQueryString) if err != nil { log.Println(err) } embedDetails := "/embed/authorize?" + embedQueryString + "&embed_signature=" + signatureString query := serverAPIUrl + embedDetails log.Println(query) result, err := http.Get(query) if err != nil { log.Println(err) } log.Println(result) response, err := ioutil.ReadAll(result.Body) if err != nil { log.Fatalln(err) } w.Write(response) } //w.Write(result.Body) } } func getSignatureUrl(queryData string) (string, error) { encoding := ([]byte(embedSecret)) messageBytes := ([]byte(queryData)) hmacsha1 := hmac.New(sha256.New, encoding) hmacsha1.Write(messageBytes) sha := base64.StdEncoding.EncodeToString(hmacsha1.Sum(nil)) return sha, nil } func unmarshal(data string) (interface{}, error) { var iface interface{} decoder := json.NewDecoder(strings.NewReader(data)) decoder.UseNumber() if err := decoder.Decode(&iface); err != nil { return nil, err } return iface, nil } -
Initialize the variables
embedSecretanduserMailfor authorization purposes. -
To obtain the specific dashboard details from the server, initialize the API
/getDetails. -
This API uses the method
getSignatureUrl()to generate the algorithm. In thegetEmbedDetails()API, theembedQueryString,userEmail, and the value from thegetSignatureUrl()method are appended as query parameters in the URL to get details of a particular dashboard. -
First, run the Go application. Then, run the VueJs application by using
npm run serveto render the dashboard.